What you need
- A PC with Windows 10 or Windows 11 (64-bit).
- An Astria VPN account (email and password). No account yet? The free 24-hour trial is issued in Telegram by the bot @AstriaVPN_bot and gives you a real account for one device.
- An internet connection for the first sign-in, and permission to install apps (Windows asks for administrator approval during installation).
Step 1: Install the app and sign in
Open astriavpn.com/download on your PC, choose Windows and sign in to your account — the download is available to account holders. Run the downloaded installer (a file named like AstriaVPN_x.y.z_x64-setup.exe) and approve the administrator prompt: the installer sets up a small background service that creates the protected connection, so you are not asked for administrator rights every time you connect.
If Windows shows a SmartScreen notice for a newly downloaded installer, make sure you downloaded it from astriavpn.com while signed in, then choose “More info” and “Run anyway”. The installer speaks English, Russian, Ukrainian and Chinese.
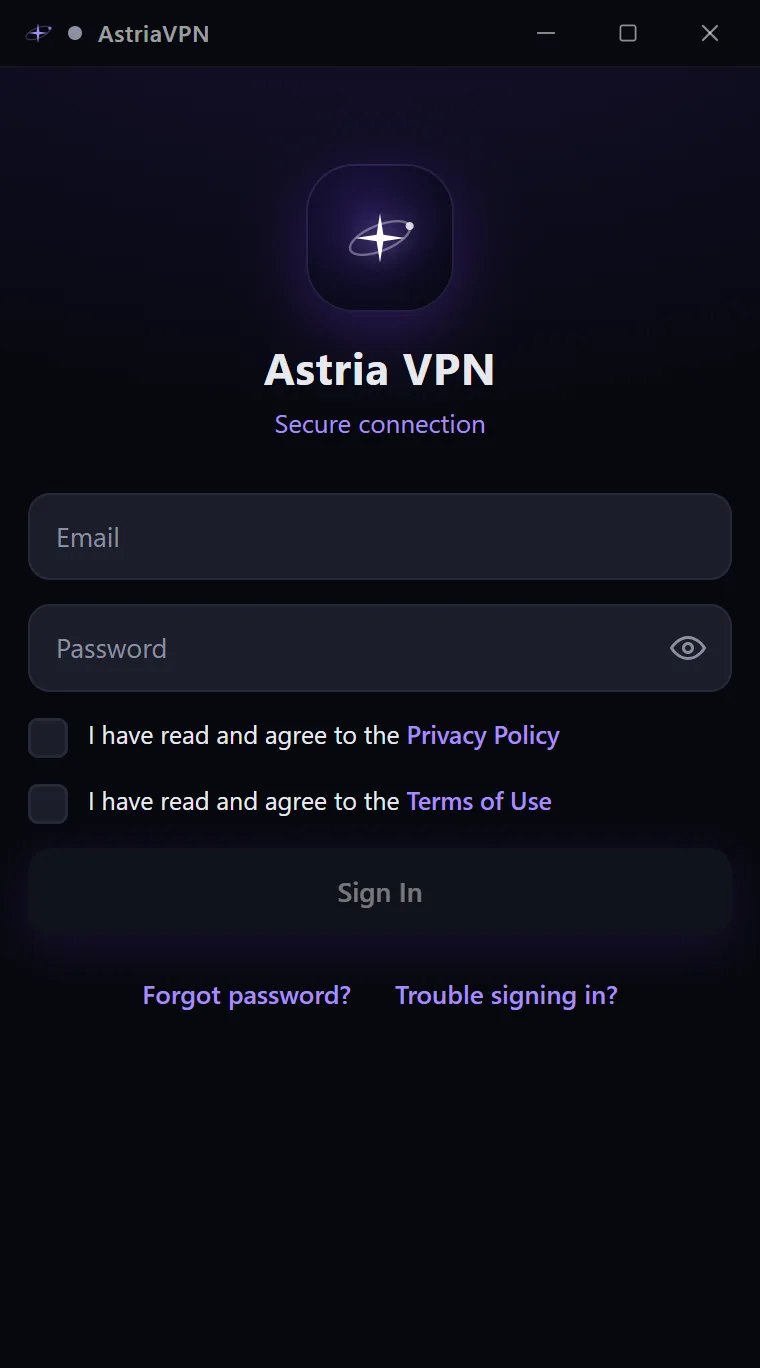
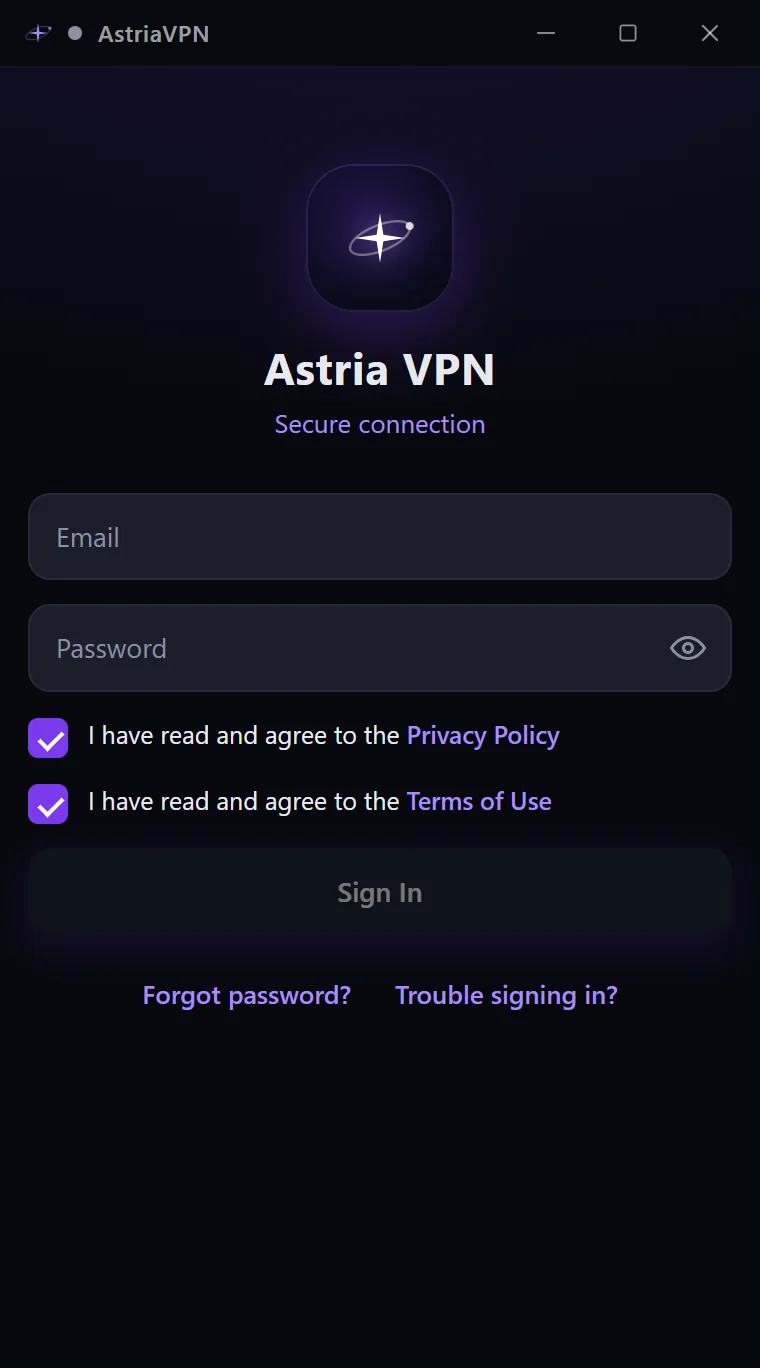
Launch Astria VPN. On the sign-in screen enter the email and password of your account, tick that you have read and agree to the Privacy Policy and the Terms of Use (the links in the text open these pages on the website) and click “Sign In”. While the fields are empty and the agreement is not ticked, the “Sign In” button stays inactive. The eye icon in the password field shows what you typed.
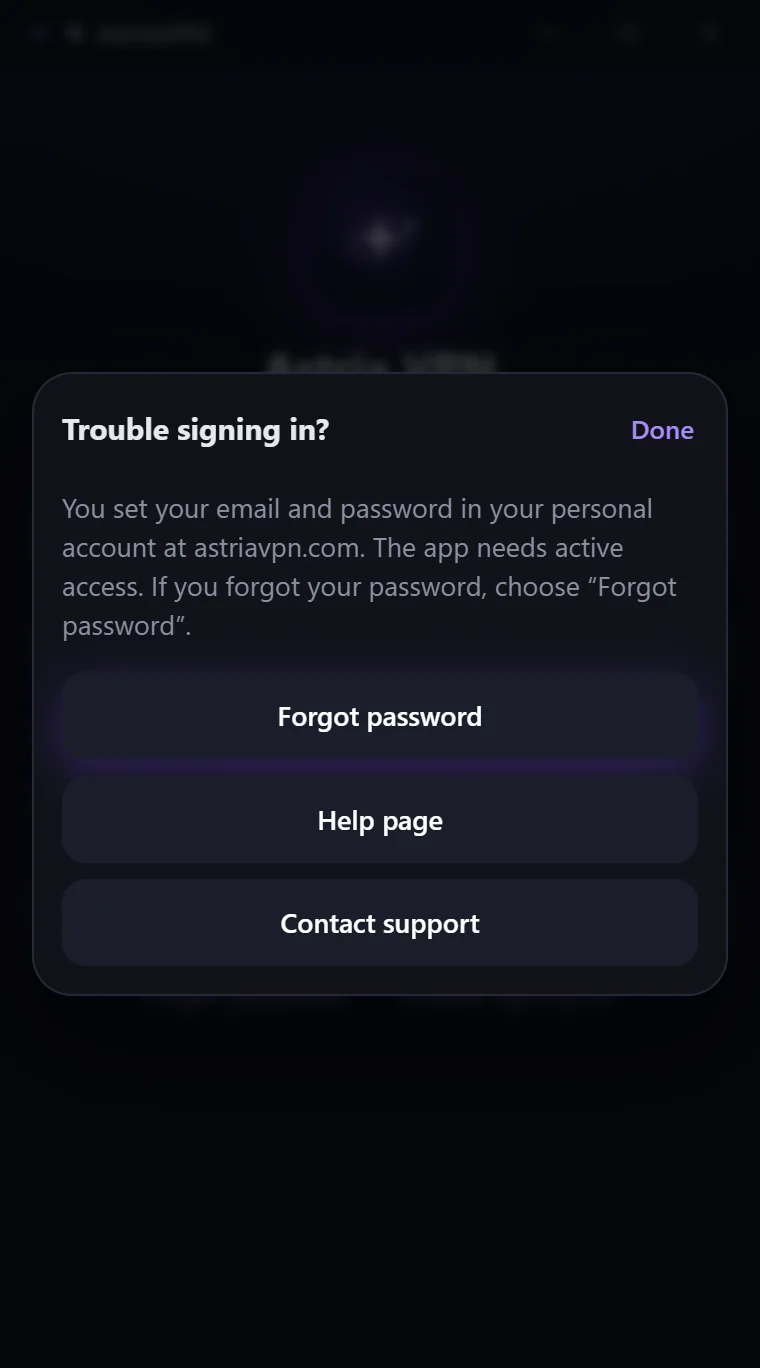
Two links sit under the button. “Forgot password?” opens the password recovery page in your personal account at billing.astriavpn.com. “Trouble signing in?” opens a help sheet: you set your email and password in your personal account at astriavpn.com, and the app needs active access. The sheet offers three actions — “Forgot password” (recover the password in the account), “Help page” (astriavpn.com/support#forgot-password) and “Contact support”.
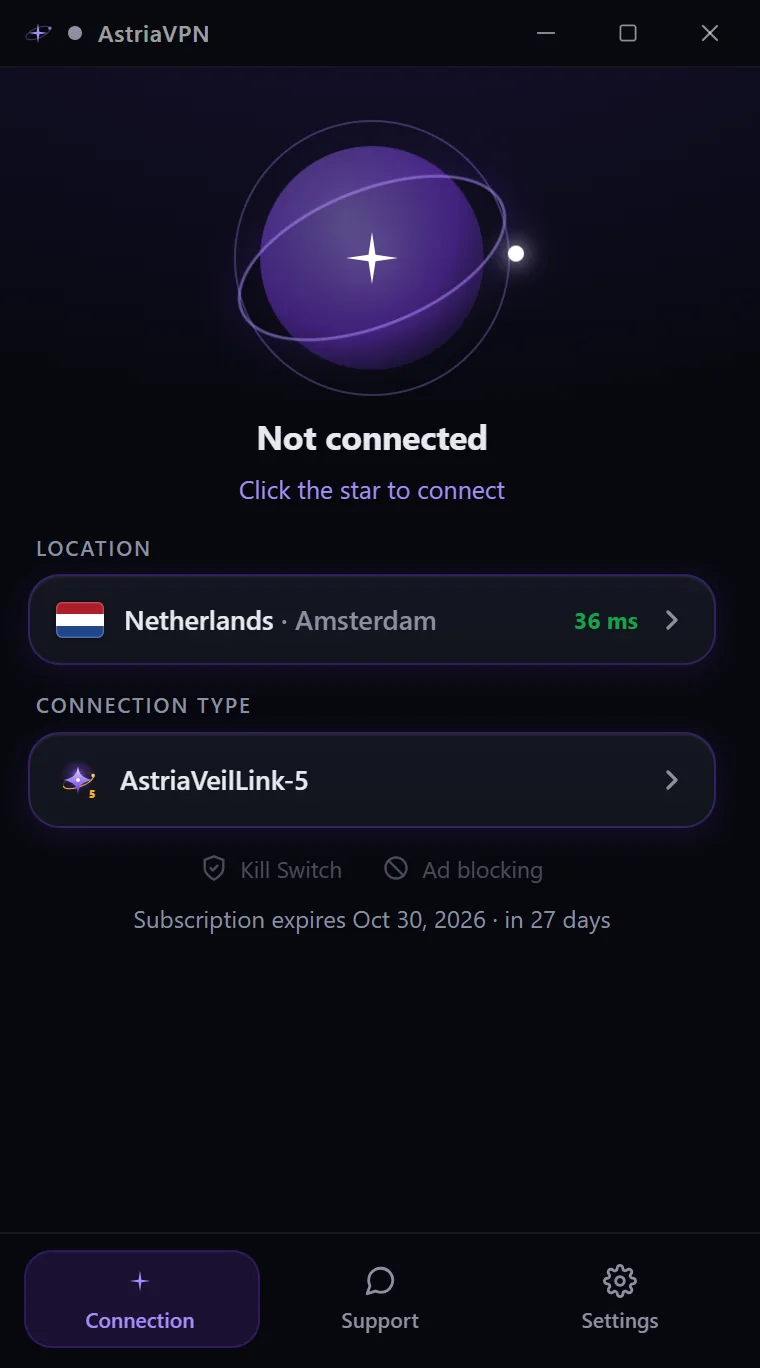
After signing in you land on the Connection tab. The end date of your subscription is shown under the connection controls.
Step 2: Connect with one click
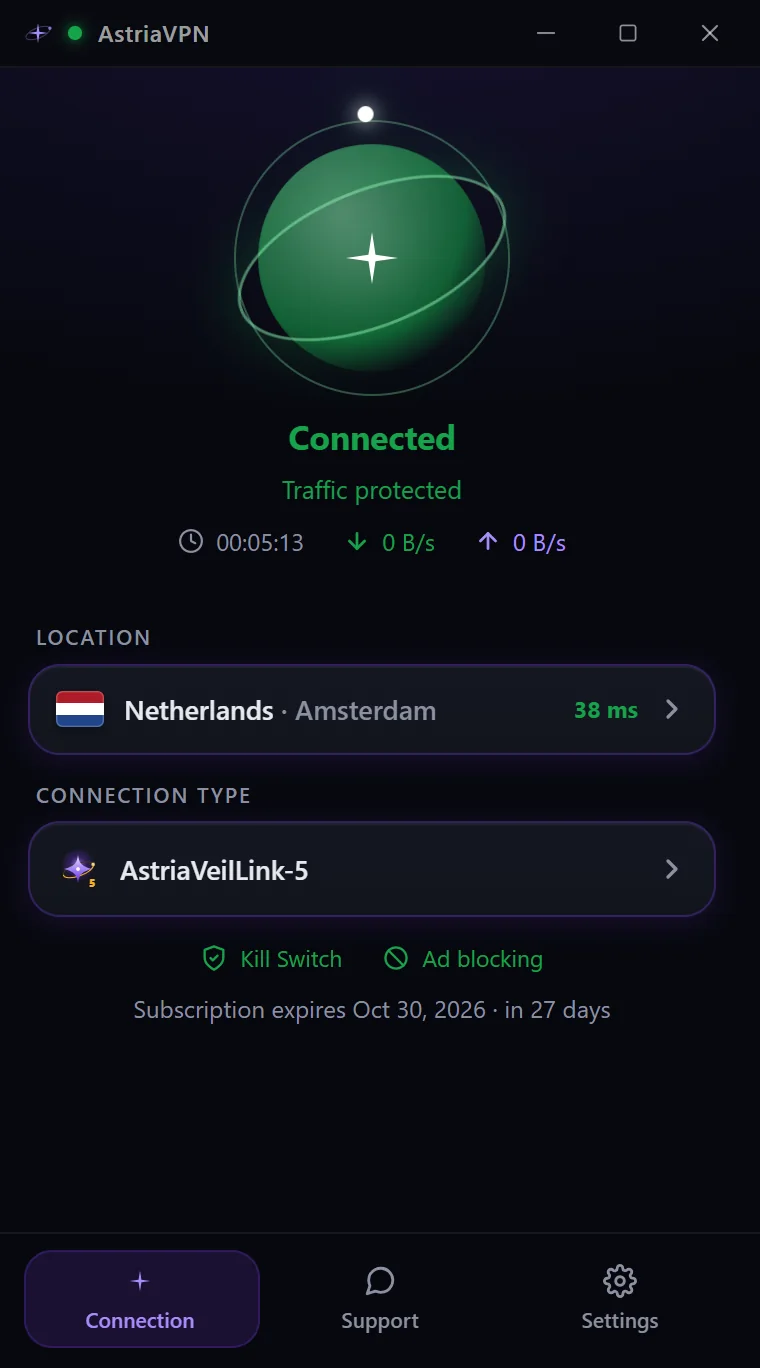
The main screen is the Connection tab. The status line reads “Not connected” with the hint “Click the star to connect”. Choose a location first (next step), then click the Astria star in the middle of the screen.
The status changes to “Connecting… Establishing a secure tunnel…” and, in a few seconds, to “Connected — Traffic protected”. The star turns green and you see a timer and live upload and download speed. Click the star again to disconnect.
The address line under the timer (your address inside the tunnel) can be hidden with “Show connection speed” in Settings.
Step 3: Choose a location
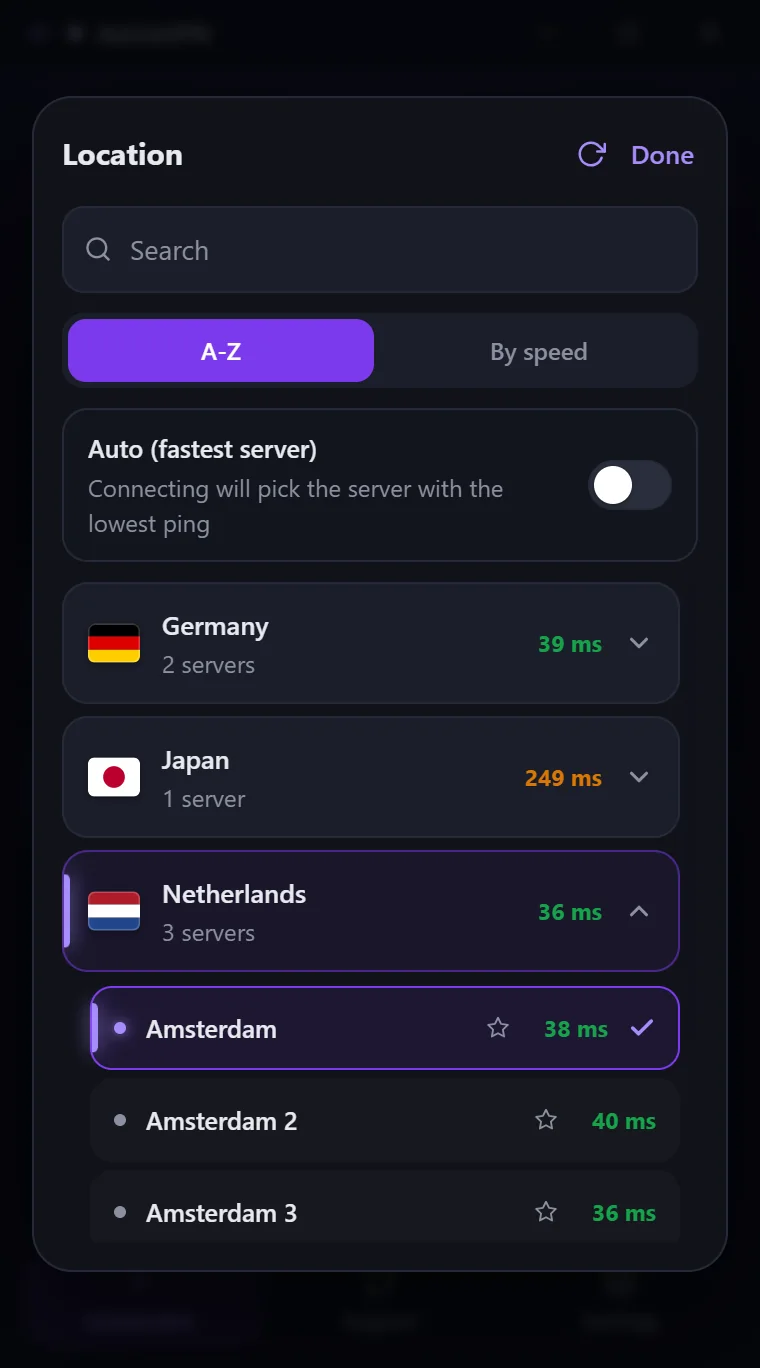
Click the Location field to open the list of countries. Each country shows its number of servers and its current response time; green means fast. Use “A-Z” to sort by name or “By speed” to put the quickest countries first, type in the search box to find a country, and click the refresh button to re-measure.
Click a country to expand it and pick a specific server. Turn on “Auto (fastest server)” and the app picks the server with the lowest ping each time you connect. Click “Done” to close the list. The new choice applies the next time you connect.
Step 4: Choose the connection type — start with AstriaVeilLink-5
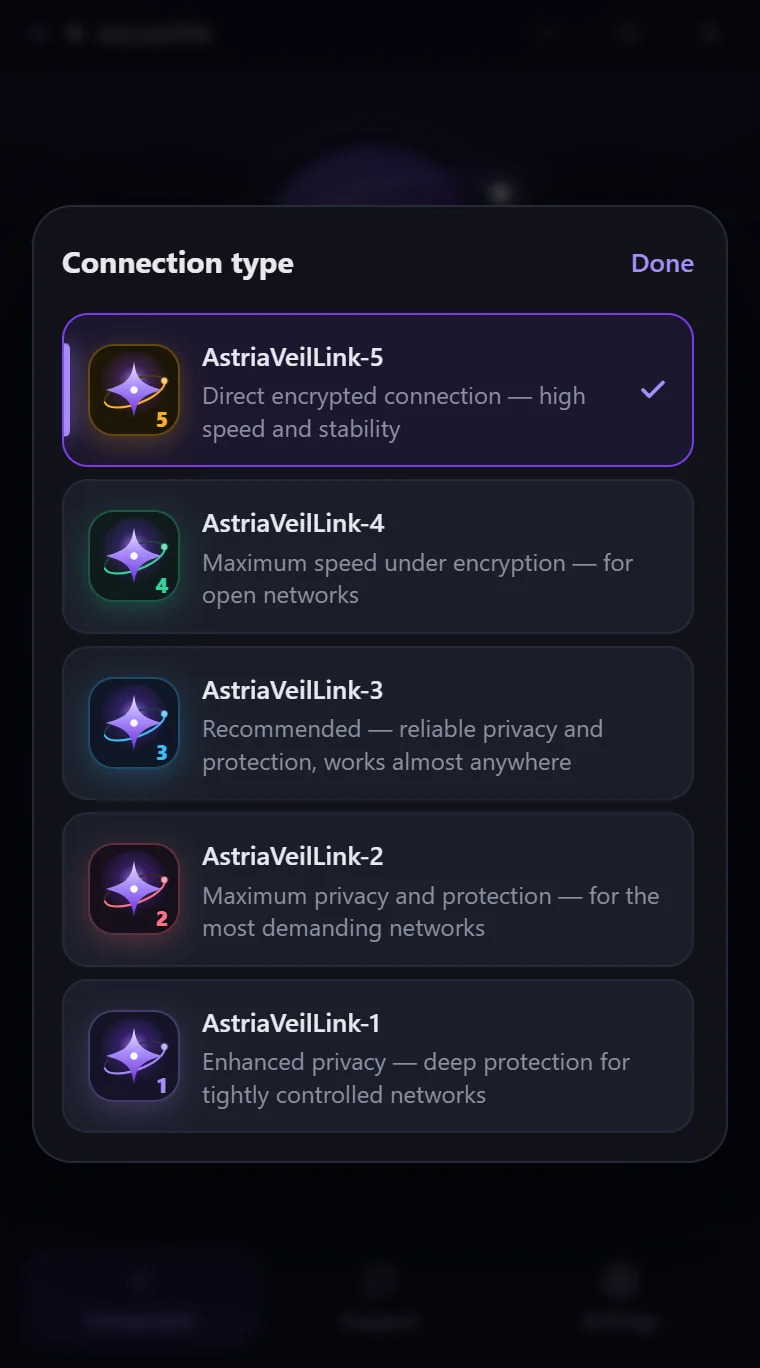
Under “Connection type” you pick one of five AstriaVeilLink modes. We recommend AstriaVeilLink-5 for everyone: it is a direct encrypted connection with the highest speed and stability, and it is the default.
If a particular network gives you an unstable connection, step down one mode at a time — AstriaVeilLink-4, then -3, -2 and finally -1. Each step down trades a little speed for more reliability headroom. Choose a location first: modes that are unavailable for the selected location are greyed out. The choice applies on the next connection.
- AstriaVeilLink-5 — direct encrypted connection, high speed and stability (recommended, start here).
- AstriaVeilLink-4 — maximum speed under encryption, for open networks.
- AstriaVeilLink-3 — reliable privacy and protection that works almost anywhere.
- AstriaVeilLink-2 — maximum privacy and protection for the most demanding networks.
- AstriaVeilLink-1 — enhanced privacy and the most cautious mode; the last step.
Step 5: Turn on the protection features
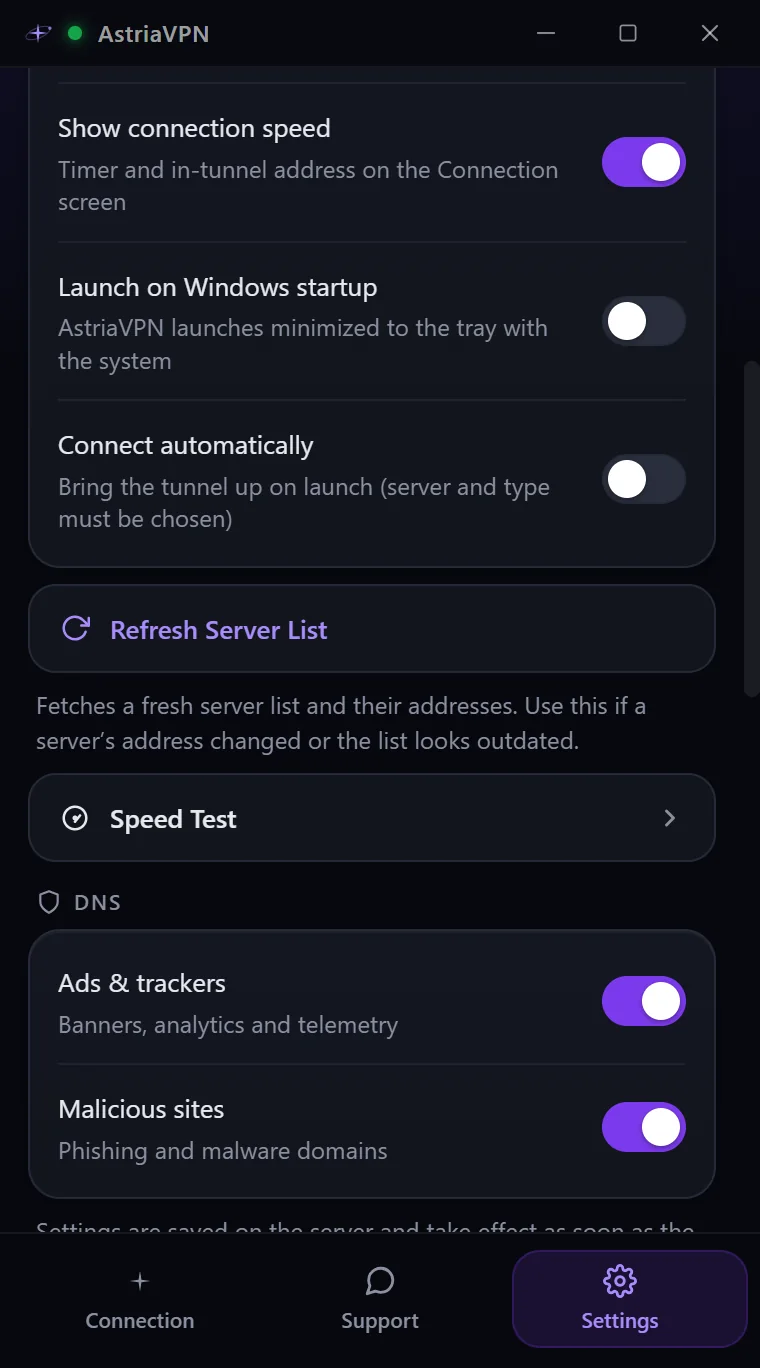
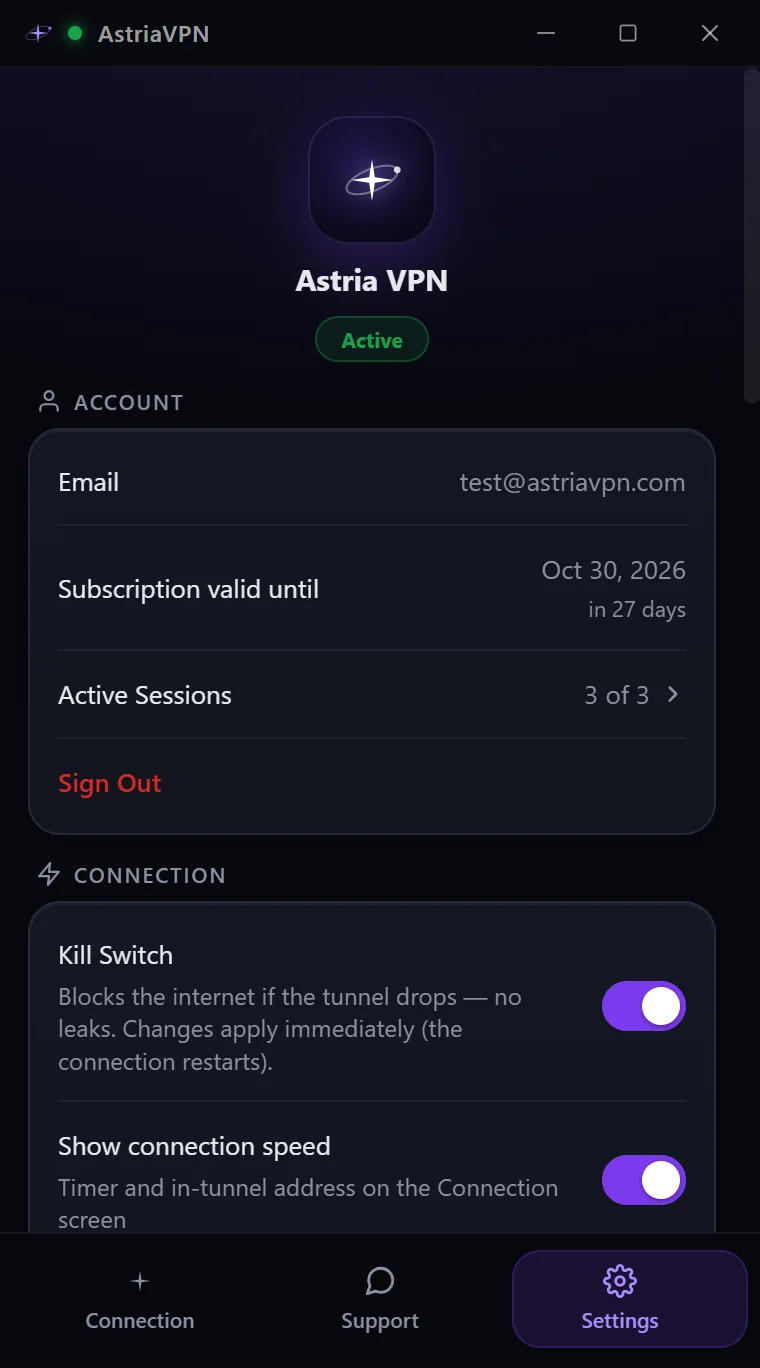
Open the Settings tab. The Connection section holds the switches that keep your data protected. Recommended setup: leave Kill Switch on, keep “Ads & trackers” and “Malicious sites” on in the DNS section, and keep the connection type on AstriaVeilLink-5.
- Kill Switch — blocks the internet if the tunnel drops, so nothing leaks outside the protected connection. Changes apply immediately and the connection restarts.
- Show connection speed — shows the timer, the live speed and your address inside the tunnel on the Connection screen.
- Launch on Windows startup — starts Astria VPN minimized to the tray together with Windows.
- Connect automatically — brings the tunnel up when the app launches (a server and a connection type must already be chosen).
- Refresh Server List — fetches a fresh list of servers and their addresses; use it if a server’s address changed or the list looks outdated.
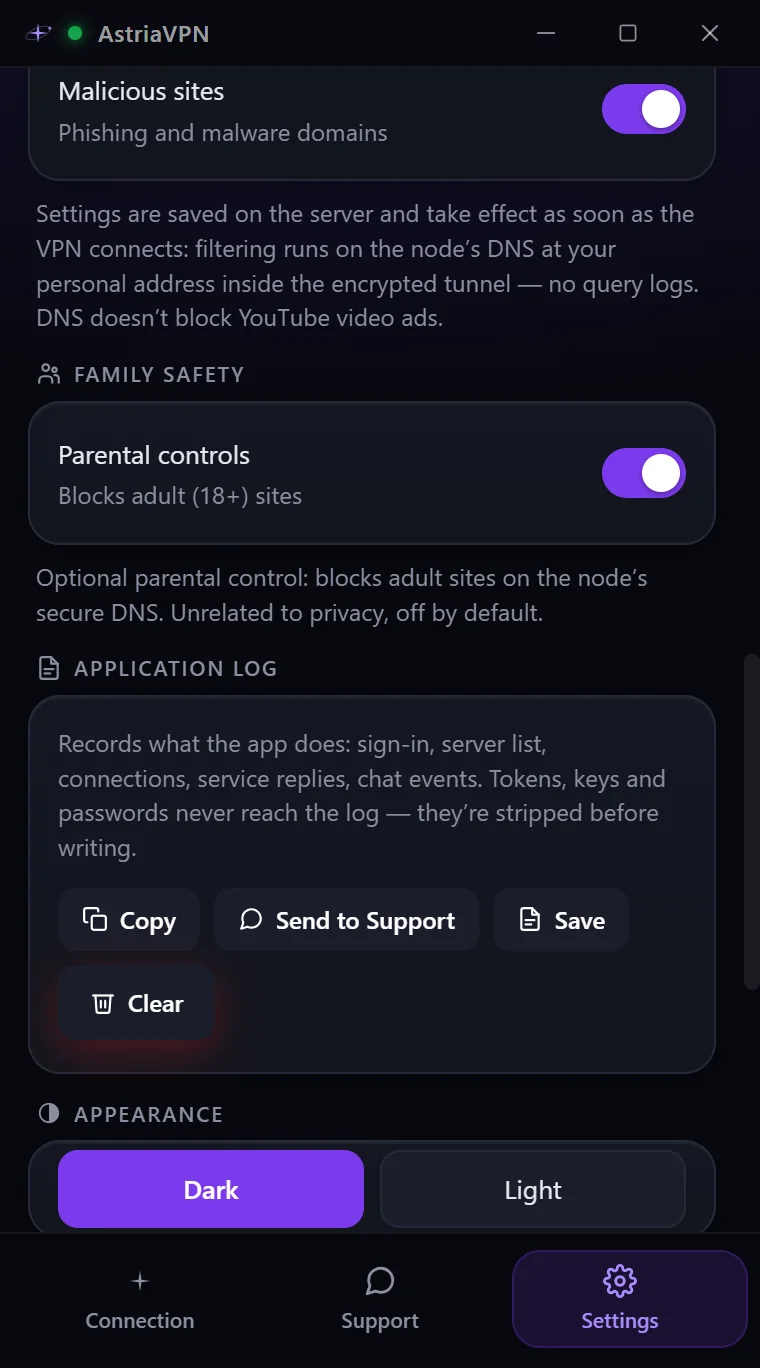
- DNS protection — your DNS queries are answered by Astria VPN’s own resolver on the VPN node, inside the encrypted tunnel, without third-party DNS providers. “Ads & trackers” blocks banners, analytics and telemetry; “Malicious sites” blocks phishing and malware domains. DNS filtering does not block YouTube video ads. Settings are saved on the server and take effect as soon as the VPN connects.
- Parental controls — an optional switch that blocks adult (18+) sites on the node’s secure DNS; it is unrelated to privacy.
Step 6: Check the speed
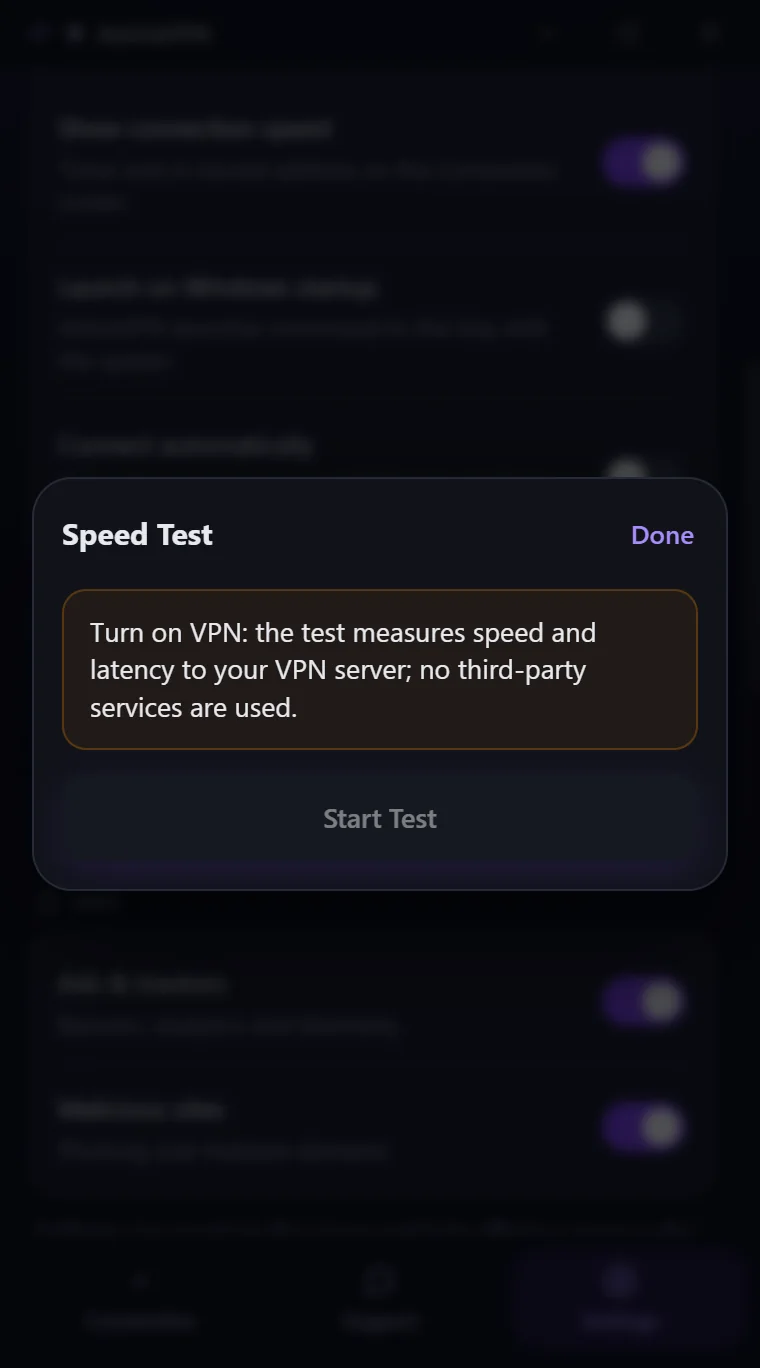
Settings → Speed Test measures your speed and response time to your Astria VPN server, through the tunnel. It works only while the VPN is on: when it is off, the button is greyed out and the window explains “Turn on VPN: the test measures speed and latency to your VPN server; no third-party services are used.”
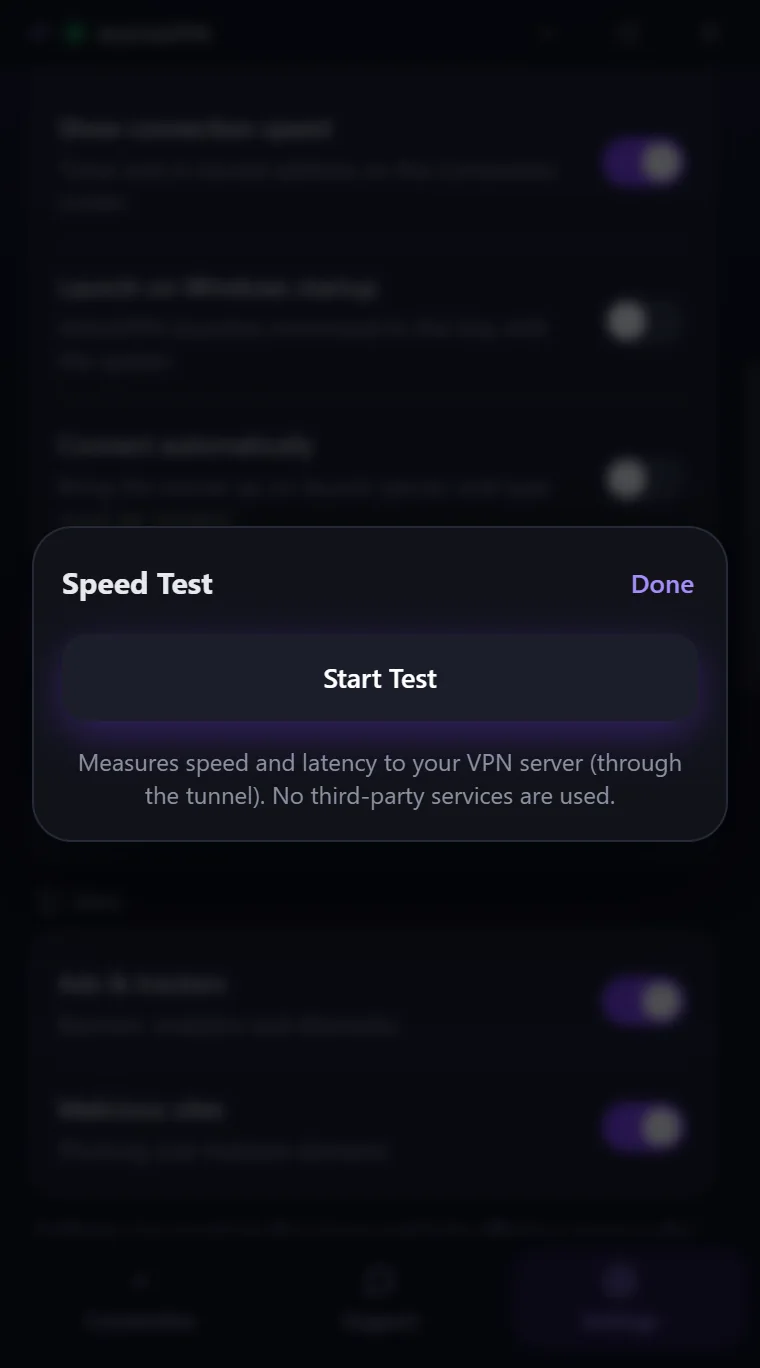
Connect first, then open Speed Test and click “Start Test”. The test uses your own VPN server, not an external website, so it shows the quality of your protected connection. It takes about half a minute: a live chart shows the download and upload phases.
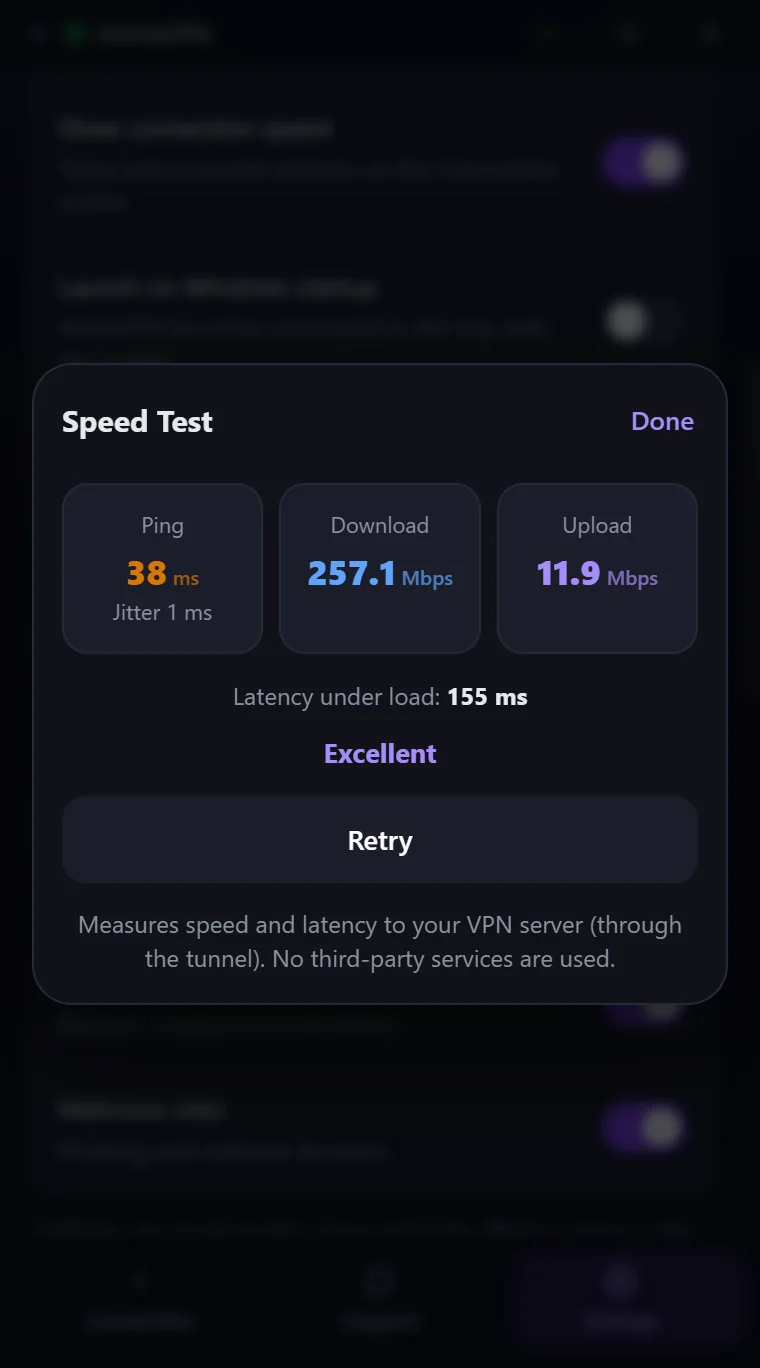
The result shows ping and jitter, download and upload speed and the latency under load, with a short rating. Click “Retry” to measure again.
Step 7: Account, devices and language
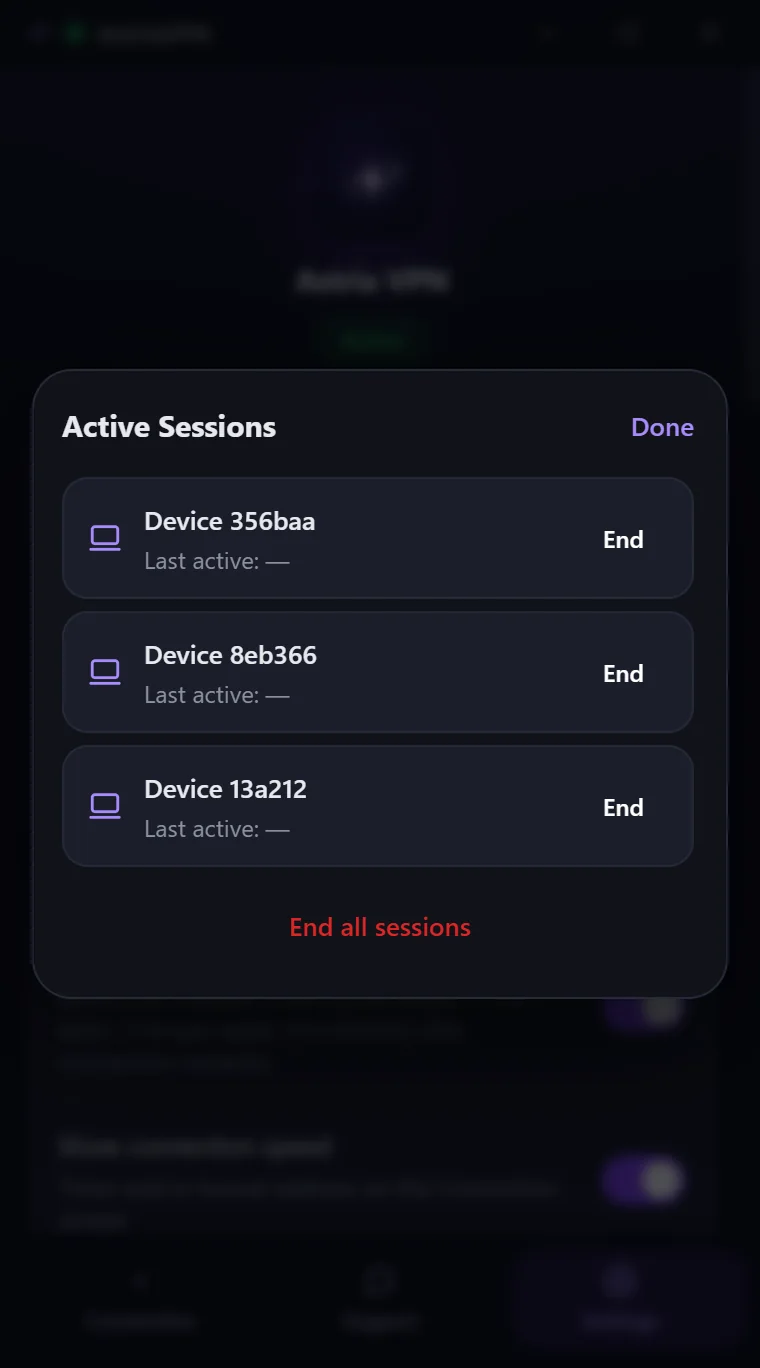
At the top of Settings you see your account: email, subscription end date and “Active Sessions” — how many of your allowed devices are signed in (for example “3 of 3”). Open it to see your devices and sign any of them out, or choose “End all sessions”. “Sign Out” signs this PC out of your account.
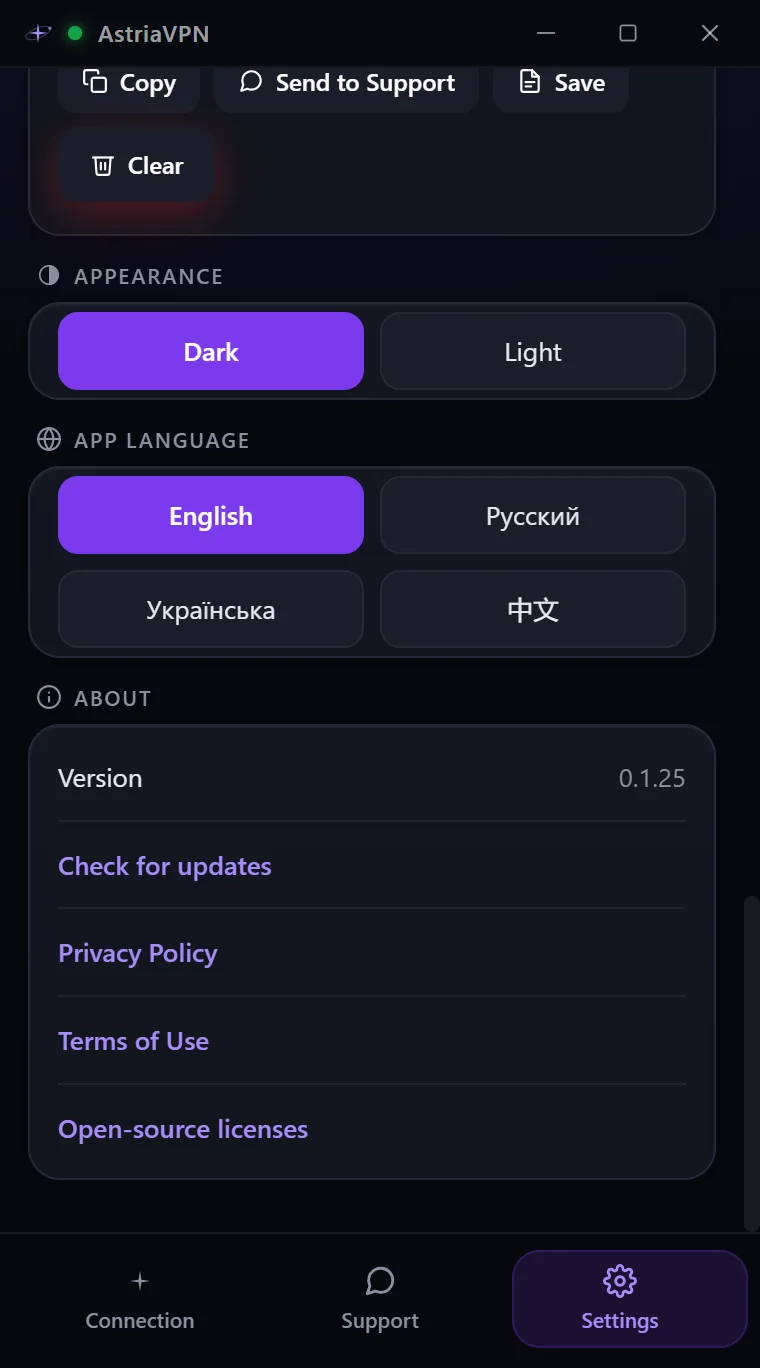
At the bottom of Settings choose Dark or Light appearance and the app language — English, Russian, Ukrainian or Chinese. “About” shows the app version and has “Check for updates”, the Privacy Policy, the Terms of Use and the open-source licenses.
Step 8: Contact support in the app
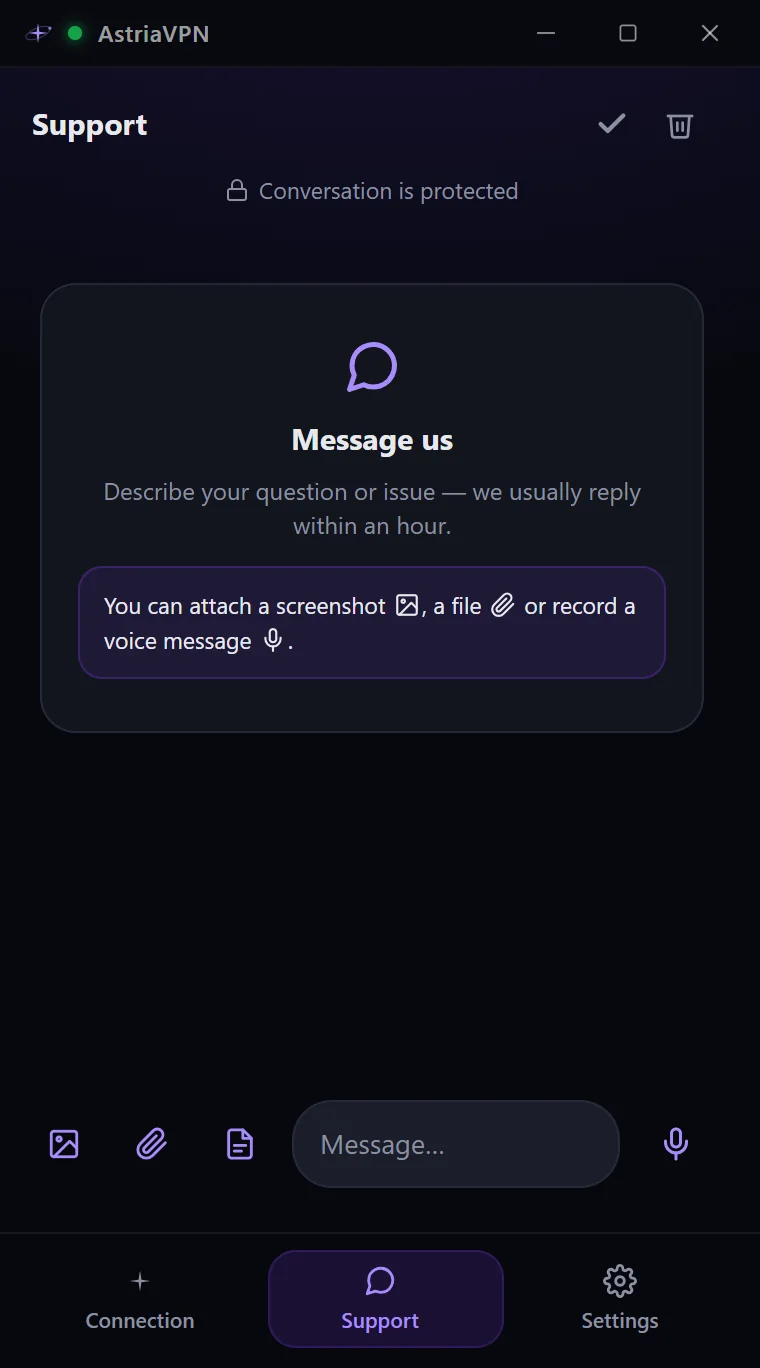
The Support tab opens an end-to-end protected chat with our team; we usually reply within an hour. Describe the problem and attach a screenshot, a file or a voice message with the buttons next to the message field. You can also write to support@astriavpn.com.
If something goes wrong, open Settings → Application log and use “Send to Support”: the log records what the app does (sign-in, server list, connections), and tokens, keys and passwords are removed before anything is written.
Quick tips for the best protection
- Keep the connection type on AstriaVeilLink-5 and only change it if a network is unstable.
- Leave Kill Switch and DNS protection on at all times.
- Turn on “Launch on Windows startup” and “Connect automatically” so the protection starts with your PC.
- Run the speed test only after you connect — it measures the path to your VPN server.
- Send the application log to support if you contact us about a problem.
Frequently asked questions
Which connection type should I use on Windows?
Use AstriaVeilLink-5. It is the recommended default — a direct encrypted connection with the highest speed and stability. Switch to -4, -3, -2 and -1 only if a network makes the connection unstable.
How do I connect and disconnect?
Open the Connection tab and click the Astria star. It turns green when you are connected. Click it again to disconnect.
What does Kill Switch do?
It blocks the internet if the tunnel drops, so your data never travels outside the encrypted connection unnoticed. Changes apply immediately and the connection restarts.
Why is the Speed Test button greyed out?
The test measures your connection to your VPN server, so it works only while the VPN is connected. Connect first, then open Settings → Speed Test.
How many devices can I use?
The number depends on your plan (1, 3 or 5 devices). Settings → Active Sessions shows how many are in use and lets you sign a device out.
Does Astria VPN block ads?
Yes — ad and tracker blocking works at the DNS level on the VPN node. YouTube video ads cannot be told apart from the video by DNS, so they remain.
Is split tunneling available on Windows?
Not yet. Split tunneling is available in the mobile apps; for the Windows app it is in development, together with a manual choice of apps and sites.
What if I forgot my password?
The password is recovered on the website, in your personal account: open billing.astriavpn.com, choose “Forgot password?”, enter your email and follow the link in the email we send you. The app itself has no password reset. If the email does not arrive, check your Spam folder and write to support@astriavpn.com.
Where do I get help?
Open the Support tab in the app for a protected chat, or write to support@astriavpn.com. You can send the application log from Settings.
Get the app
Download Astria VPN for Windows from the download page, or start with the free 24-hour trial in Telegram.